Hey remember the Gem wrench that slipped through the cracks recently?
http://www.ebay.com/itm/230918008941?ssPageName=STRK:MEWNX:IT&_trksid=p3984.m1497.l2649 I was the one who got it. It was not the best deal in the world after all.
I had wanted a Gem for some time. But they always went way too high.
This one was not listed with Gem in the title.
I can't decide whether the seller was just purely ignorant or evasive or outright deceptive about the wrench.
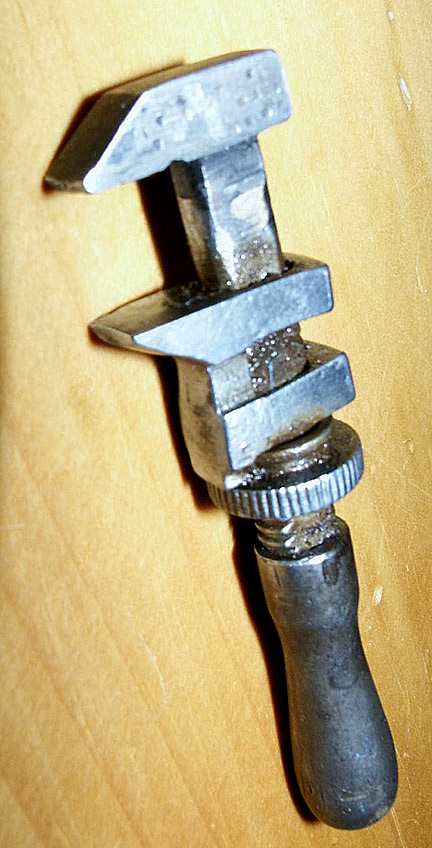
When it showed up it would only close to 3/8" or so, no further. What you see in the sale picture.
It opened all the way past there, and easily, but it would not close further.
The original pictures showed it wasn't mint. But I had no idea how far from mint it really was.
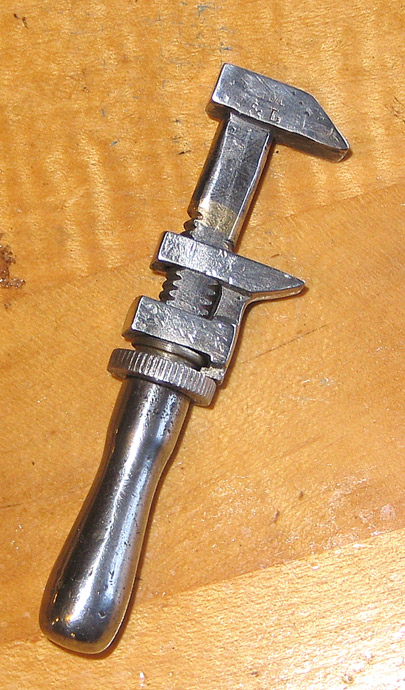
1 The main beam had been broken and brazed back together. The brazing was expert but not the after finish. The first reason the wrench wouldn't close is that the threads were full of brass.
2 What looks like indistinguishable tiny marks all over the head? Turned out to be vise jaw dimples, and deep.
3 What you can't see in the picture is that the moveable jaw carriage was bent pretty bad. A crushing injury squeezing the straps that wrap around the beam together by several degrees. This was the second reason the wrench was hard to open and close.
4 Another thing you can't see in the original picture, or at least you can't make them out well, is that the handle had been acquainted with a pipe wrench or plier jaws.
In general there was not a surface of the tool anywhere that had not sustained damage.
If it had been more expensive I would have sent it back immediately! As it was it was debatable since I didn't know how much could be reasonably repaired.
But.....................
I stripped it down. The handle unscrews and aluminum padded smooth vise jaws leave no mark. You would think everyone knows that.
I took off the screw and sliding jaw.
First thing I did was go to work on the main beam. The grinding clean up of the braze job was uneven. But these wrenches are made from soft steel and a file was what I used to true everything back up. A good flat file and time checking as you work you can work to a pretty high degree of accuracy.
Next came needle files cleaning up the threads. Several files by eye and hand, until the nut spun easy again, all the way up and down.
Then, the sliding jaw. First thing I did was drive a wedge inbetween the straps until they even back up. And then I had to make the jaw fit the beam. The beam had been altered so the jaw would flop back and forth at the bottom of the threads and then stick or freeze at the top. Now that I had the beam evened out and the straps straightened, it would flop everywhere!
So I carefully peined the jaw closed. A few blow and check. Few ore and check. On like that until it was a solid sliding fit from end to end.
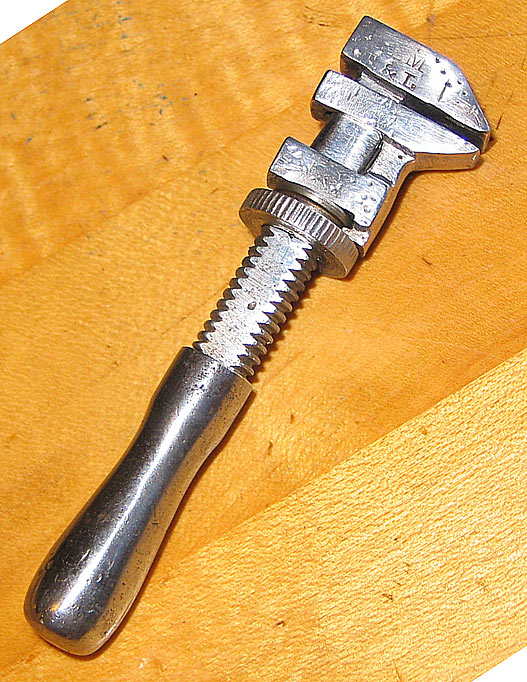
It does open and close properly and the jaws meet evenly now
Then it was time for cleanup. Since every surface had damage, but I didn't want to grind or sand the original contours away, I used a firm sewed buffing wheel and coarse "cutting" compound.
The coarse black stuff actually cuts metal, but it works slow so you have time to work before the shape of the project changes much.
When I had "resculpted" as much as I was going to do
(taking the minor damage away, and the worst damage down to lesser.......)
I moved on to a looser sewed buff and lighter compound.
It will never be anything like the Gem that sold yesterday for $80, and if I was working for someone else I would have 80 of labor in it.
I wouldn't be able to own a Gem any other way though, unless Lady Luck got seriously involved.
Remember all these pictures are blown up larger than life. This is a ~3" wrench!!!
yours Scott


